The perfect Highway 1 trip isn’t about renting a convertible and hoping for the best; it’s about mastering the logistical realities of the coast.
- Driving southbound from SF to LA is non-negotiable for safety, views, and easy access to vista points.
- An SUV beats a convertible for comfort, luggage space, and overcoming the frequent fog and cold, especially north of Big Sur.
- Proactive checks for road closures and a solid fuel strategy are essential to avoid getting stranded in remote areas with no cell service.
Recommendation: Adopt a veteran’s mindset. Prioritize practical planning over romantic ideals to ensure a seamless, stress-free, and truly breathtaking coastal journey.
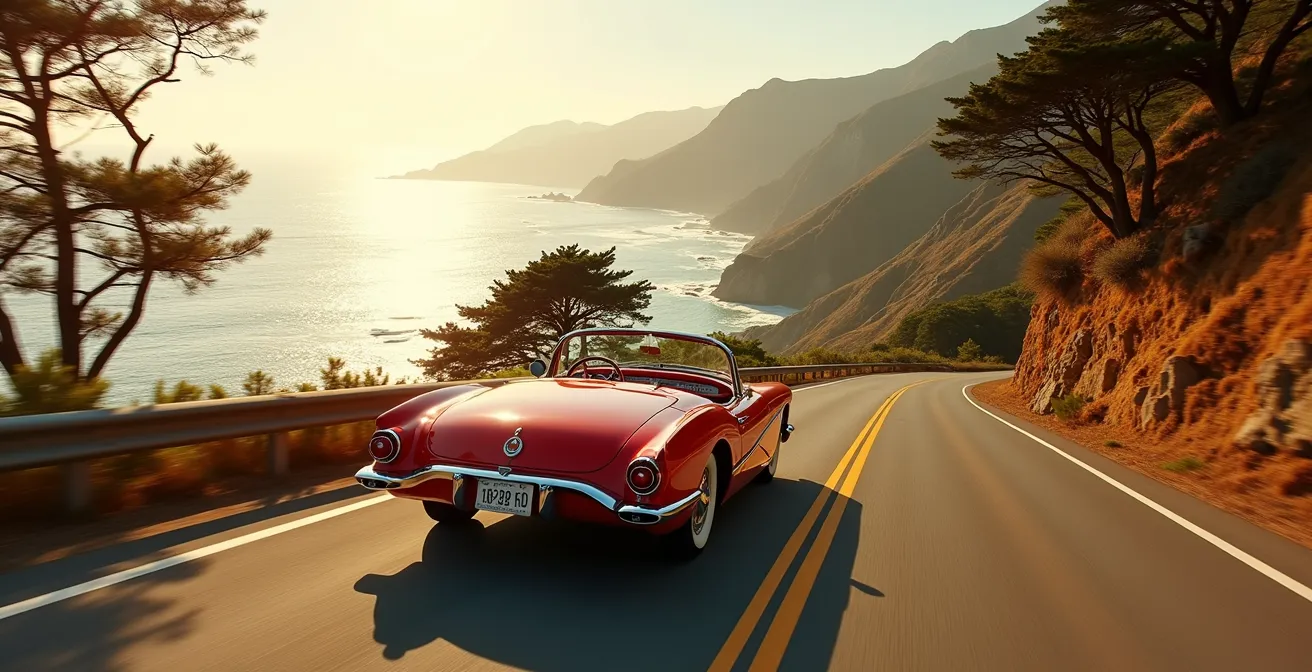
The dream of a Highway 1 road trip is a powerful one: wind in your hair, a classic convertible hugging the cliffs, and endless Pacific horizons. It’s an iconic piece of Americana. But the reality for many first-timers is a frustrating gauntlet of traffic-choked vista points, bone-chilling fog, unexpected road closures, and the low-grade anxiety of a dwindling gas tank a hundred miles from anywhere. Many guides will give you a simple checklist of famous spots, but they fail to address the crucial logistical challenges that can make or break your journey.
This isn’t just another list of places to see. This is a veteran’s playbook. What if the key to a perfect coastal drive wasn’t about the car you rent, but about the direction you drive? What if knowing when and where the road closes is more important than your dinner reservation in Carmel? This guide focuses on the strategic decisions that prevent problems before they start, transforming your trip from a game of chance into a masterpiece of logistical mastery.
We’ll cover the hard-won lessons that seasoned drivers know by heart: how to avoid the gas traps, why an SUV is often the smarter choice, and how to capture that perfect sunset photo without a dangerous drive in the dark afterward. By embracing the coastal realities of Highway 1, you can guarantee a journey that is as smooth and enjoyable as it is scenic.
Table of Contents: A Strategic Guide to the Pacific Coast Highway
- Why Sections of Highway 1 Close Frequently During Winter?
- How to Drive Southbound on the PCH for Unobstructed Ocean Views?
- Convertible vs. SUV: Which Is Truly Better for the California Coast?
- The Big Sur Gas Mistake That Leaves Drivers Stranded for Hours
- Where to Be at 7 PM for the Perfect Pacific Sunset Photo?
- The Tire Mistake That Leaves You Stranded 100 Miles from a Town
- How to Photograph the Golden Gate Bridge from the Marin Headlands?
- How to Spot a Safe Motel at a Lonely Interstate Exit?
Why Sections of Highway 1 Close Frequently During Winter?
Highway 1 through Big Sur isn’t just a road; it’s an engineering marvel clinging to the edge of an active geological landscape. The primary reason for frequent winter closures is the combination of heavy rainfall and the steep, unstable slopes of the Santa Lucia Mountains. The soil becomes saturated, leading to everything from minor rockfalls to catastrophic mudslides that can wipe out entire sections of the highway. These are not minor inconveniences; they are a fundamental coastal reality of traveling this route between November and April.
The scale of these events can be immense. For perspective, historic data shows that one slide in 1983 closed the highway for 14 months while crews removed over 4 million cubic yards of debris. More recently, the road’s vulnerability was highlighted again during a major weather event. In January 2021, a debris flow washed out a 150-foot section of the highway near Rat Creek, completely severing the route. It took three months of intensive work to reopen the road. This isn’t a rare occurrence; it’s a predictable risk during the rainy season.
Ignoring this risk is the biggest mistake a winter traveler can make. A closure in the heart of Big Sur doesn’t just mean a short delay; it means a 2-3 hour detour inland via treacherous, winding roads like Nacimiento-Fergusson Road (which is often closed itself during storms) or backtracking significantly to use Highway 101. Relying on GPS alone is a recipe for disaster. Proactive planning is the only solution.
How to Drive Southbound on the PCH for Unobstructed Ocean Views?
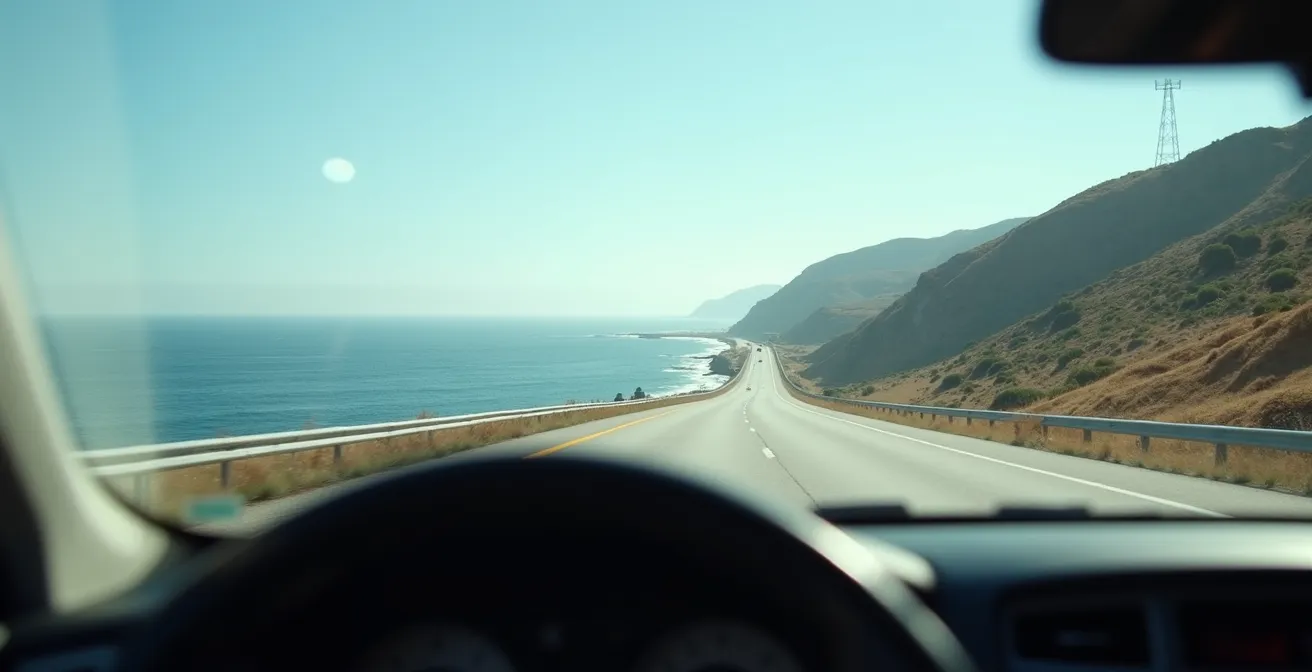
Every veteran of Highway 1 will give you the same non-negotiable piece of advice: drive south, from San Francisco to Los Angeles. This isn’t just a casual preference; it’s a core strategic decision that fundamentally improves the safety, logistics, and enjoyment of your trip. The reason is simple: the southbound lane is the ocean-side lane. This positioning gives you direct, unobstructed views of the Pacific, without the guardrails and opposing traffic of the northbound lane interfering with your line of sight.
The practical benefits go far beyond just a better view from your window. All the iconic vista points and unmarked pullouts are on the western side of the road. When driving south, you can spot an upcoming turnout and make a safe, easy right turn to pull over. Northbound drivers, in contrast, face the daunting and often dangerous task of stopping in their lane, waiting for a break in oncoming traffic (which can be relentless), and making a sharp left turn across the highway. This constant friction point adds stress and wastes time, often causing drivers to skip spontaneous photo opportunities.
This illustration shows the clear advantage from the driver’s perspective in the southbound lane. The ocean is your constant companion, and the essential turnout areas are directly accessible on your right.
Furthermore, California has a “five or more vehicles” turnout rule, requiring slower vehicles to pull over and let others pass. Driving south makes complying with this courtesy effortless. It allows you to set your own pace, pulling over to let faster traffic go by without the stress of finding a suitable spot across the road. This single choice—driving south—is the foundation of a relaxed, scenic, and logistically sound road trip.
Convertible vs. SUV: Which Is Truly Better for the California Coast?
The convertible Mustang is the romantic hero of the Highway 1 fantasy, but for a 3-day trip, it’s often a deeply impractical choice. A compact or mid-size SUV is the veteran’s secret weapon. The coastal weather is notoriously fickle; the drive from San Francisco to Monterey is frequently blanketed in dense, cold fog, even in summer. A convertible top will stay firmly up, and you’ll be wishing for the better climate control and insulated cabin of an SUV.
Beyond weather, two major factors tip the scales: viewing angle and luggage space. The higher seating position of an SUV allows you to see over the guardrails that often block the view from a low-slung sports car. You’re paying for the view; it makes sense to choose a vehicle that lets you see it. Luggage is the other deal-breaker. A 3-day trip requires at least two carry-on bags and personal items, which will completely fill the tiny trunk of a Mustang convertible, leaving your valuables exposed on the back seat—a major risk in tourist-heavy parking lots.
As one traveler who opted for a last-minute deal noted, the fantasy can sometimes be affordable, but it doesn’t solve the practical issues. As they shared from their experience with The Wanderbug:
The Avis desk offered us an upgrade from standard sedan to a convertible Mustang for just $30 extra a day – less than half price of the usual fee.
– Real convertible upgrade experience on PCH, The Wanderbug
While a cheap upgrade can be tempting, a deliberate choice based on logistics is usually wiser. The following table breaks down the practical realities of each vehicle type for this specific journey. The data clearly shows that for a multi-day trip focused on comfort and practicality, the SUV consistently comes out ahead.
| Factor | Convertible | SUV |
|---|---|---|
| Luggage Capacity | Limited trunk space (2-3 small bags) | Ample cargo area (5-6 bags plus gear) |
| Weather Adaptability | Poor in fog/cold (common in SF-Monterey) | All-weather comfort with climate control |
| Viewing Angle | Low position, guardrails block views | Higher seating sees over barriers |
| 3-Day Rental Cost | $450-600 average | $300-400 average |
| Fuel Economy | 25-30 MPG highway | 20-25 MPG highway |
The Big Sur Gas Mistake That Leaves Drivers Stranded for Hours
The 90-mile stretch of Highway 1 through Big Sur, roughly between Carmel and San Simeon, is one of the most beautiful drives on Earth. It is also a “gas desert.” There are only a handful of gas stations in this entire section, and they operate like desert oases, charging extreme prices. Running low on fuel here is not a minor issue; it’s a trip-ruining mistake that can leave you stranded for hours with no cell service to call for help.
The price shock is real and significant. For instance, reports from local news outlets like KSBY have shown that gas prices in Big Sur’s remote areas can be 66% higher than the average in nearby towns. Paying nearly $8 a gallon is a painful lesson in poor planning. The veteran’s rule is simple and absolute: fill your tank in Monterey or Carmel before heading south, or in Cambria or San Simeon before heading north. This single action saves you money and eliminates a major source of anxiety.
The feeling of watching your gas gauge drop toward empty on this isolated, winding road is a unique form of travel stress. There are no easy exits, no shortcuts, and no guarantees the next station will even be open.
This mistake is entirely avoidable with a simple strategic mindset. Treat the Big Sur coast like a national park with limited services. Your car should be fully fueled and checked before you enter this remote zone. Don’t assume you can “just get gas later.” On this stretch of coast, “later” might be 50 miles and two hours away, with a hefty price tag waiting for you if you even make it.
Where to Be at 7 PM for the Perfect Pacific Sunset Photo?
Capturing the Pacific sunset is a highlight of any Highway 1 trip, but a great photo requires more than just luck. It demands strategic positioning. The ideal location changes dramatically with the seasons due to the shifting angle of the sun. In the summer, when the sun sets in the northwest, classic spots like Bixby Bridge or the headlands at Garrapata State Park offer breathtaking compositions. In the winter, the sun sets further south, making locations like Ragged Point or the Elephant Seal Vista Point near San Simeon better choices for dramatic lighting.
Simply showing up at sunset isn’t enough. The most critical, and often forgotten, part of the plan is what happens *after* you get the shot. As the travel experts at Local Adventurer warn, the post-photo drive is where the danger lies:
The biggest mistake is not planning the drive after the photo – Highway 1 is unlit, winding, and has frequent wildlife crossings at dusk.
– California road trip experts, Local Adventurer travel blog
This is a crucial piece of the veteran’s playbook. Driving this treacherous road in the pitch-black is stressful and dangerous. Your sunset spot should always be within a 20-30 minute drive of your overnight accommodation. To execute this perfectly, you need a clear, actionable plan.
Your Sunset Photography Action Plan
- Select Your Spot Based on Season: Use a tool like the PhotoPills app to determine the sunset angle for your travel date and choose your location accordingly (e.g., Bixby for summer, Ragged Point for winter).
- Book Nearby Lodging: Secure your hotel or motel within a 20-minute drive of your chosen sunset location to ensure a short, safe trip after dark.
- Arrive Early: Plan to be at your spot at least 30-45 minutes before the official sunset time to find parking, set up your gear, and capture the “golden hour” light.
- Scout for Alternatives: If your primary spot is too crowded, have a backup in mind. The bluffs at Andrew Molera State Park or the unmarked pullouts just north of Ragged Point are excellent, less-trafficked options.
- Pack for the Dark: Have a flashlight or headlamp ready for packing up your gear and navigating back to your car safely after the last light has faded.
The Tire Mistake That Leaves You Stranded 100 Miles from a Town
While a dramatic landslide or an empty gas tank are well-known risks, a far more common trip-ender is something much more mundane: a flat tire. The shoulders of Highway 1, especially in the rugged Big Sur section, are often unpaved and littered with sharp rocks. Pulling over for a photo can easily result in a puncture, and like the gas problem, you could be dozens of miles from the nearest town with no cell service.
This risk is amplified by rental cars, whose tire condition is often an unknown variable. A pre-trip inspection is not optional; it’s a critical safety step. Before you even leave the rental lot, you must perform a thorough check. Worn tread, sidewall bulges, or cracks are red flags that should have you demanding a different vehicle. The “penny test” is a simple, effective method: place a penny with Lincoln’s head upside down in the tread. If you can see all of his head, the tires are bald and unsafe for this journey.
Another critical mistake is failing to understand your spare tire. Many rental cars come with a temporary “donut” spare, which is only designed to be driven for about 50 miles at a maximum speed of 50 mph. In the heart of Big Sur, 50 miles might not even get you to a town with a tire shop. Knowing whether you have a full-size spare or a donut dictates your entire emergency plan. A thorough pre-trip protocol is essential.
- Perform the Penny Test: Check the tread depth on all four tires.
- Inspect Sidewalls: Look for any visible bulges, cracks, or signs of damage.
- Verify the Spare: Confirm if it’s a full-size or a temporary donut spare and check its pressure.
- Document Condition: Take photos of the tires before leaving the rental lot to protect yourself from pre-existing damage claims.
- Pack an Emergency Kit: Consider bringing tire sealant and a portable compressor for minor punctures.
How to Photograph the Golden Gate Bridge from the Marin Headlands?
The iconic, postcard-perfect shot of the Golden Gate Bridge with San Francisco in the background is taken from the Marin Headlands, just across the bridge to the north. But getting this shot requires navigating crowds, traffic, and a serious security risk. There are three primary viewpoints, each offering a different perspective:
- Battery Spencer: This is the classic, eye-level vantage point. It’s the most popular and therefore the most crowded. For the best light and fewest people, you must arrive before sunrise.
- Hawk Hill: Located higher up, this spot provides a sweeping panoramic view of the bridge, the city, and the bay. It is the best location for capturing the golden hour light at sunset.
- Kirby Cove: For a unique, beach-level perspective looking up at the bridge, Kirby Cove is unbeatable. It requires a short hike down and, for drive-in access, a camping reservation made months in advance. The famous swing here is a popular photo prop.
Navigating the Headlands has its own logistical challenges. On weekends, Conzelman Road often converts to a one-way traffic system, causing significant delays. Fog is another major factor; mornings are often completely socked in, with the fog typically burning off by early afternoon. However, the most critical piece of local knowledge is the security situation. This area is notorious for “smash-and-grab” car break-ins.
Local authorities and travel guides issue stark warnings about this ongoing problem. It is an absolute rule that you should never leave any valuables visible in your car, and ideally, you should take everything with you.
The Smash-and-Grab Epidemic – take all luggage and valuables with you or leave nothing visible in the car.
– Local safety advisory, San Francisco travel safety guide
Your first stop on a grand road trip should not begin with a shattered window and stolen luggage. Treat this security warning with the utmost seriousness. The perfect photo is not worth losing your passport and bags.
Key Takeaways
- Logistical Reality: Always check CalTrans QuickMap for real-time closures, especially from November to April, as detours can add 2-3 hours.
- Strategic Direction: Driving southbound (SF to LA) is non-negotiable for safety, unobstructed views, and easy access to pullouts without crossing traffic.
- Practical Preparation: An SUV often beats a convertible for weather adaptability and secure luggage space, while a full gas tank and a pre-trip tire check are essential before entering the remote Big Sur section.
How to Spot a Safe Motel at a Lonely Interstate Exit?
After a long day of driving, pulling off a dark interstate exit to find a place to sleep can feel like a lottery. The quality and safety of roadside motels can vary dramatically. A veteran road-tripper, however, knows a simple but highly effective method for gauging the safety of a location: the “Trucker Test.” Professional truck drivers are on the road for a living, and their number one priority for an overnight stop is security. If you see several semi-trucks parked in the motel lot for the night, it’s a strong positive indicator.
As trucking safety experts on professional driver forums often state, this is a core principle of their work. They actively seek out safe havens on their long routes.
Professional drivers prioritize well-lit, secure locations with 24/7 staffing, making them reliable indicators of a safe stop.
– Trucking safety experts, Professional driver forums
You can supplement the Trucker Test with a few other modern and common-sense checks to create a robust safety evaluation method before you ever hand over your credit card. Technology like Google Street View allows for a virtual inspection before you even arrive, and online reviews can be a goldmine of information if you know how to read them. Instead of looking at the 5-star reviews, filter for the 1-star reviews and search for keywords like “safe,” “lock,” “stolen,” or “creepy.” This gives you a clear picture of the worst-case scenarios reported by other guests.
Before committing to a room, apply this final checklist:
- Pass the Trucker Test: Are there multiple semi-trucks parked for the night?
- Do a Drive-Through: Assess the parking lot lighting. Are there visible security cameras? Does the area feel well-maintained or neglected?
- Check the Lobby: Is there a proper, accessible lobby or just a sketchy night window? A 24/7 staffed lobby is a much better sign.
- Inspect Your Room: Before bringing in your luggage, verify that the door’s deadbolt and chain lock are functional and that all windows have working latches.
By replacing romantic notions with this kind of practical, strategic playbook, you transform your Highway 1 drive from a source of potential stress into what it’s meant to be: one of the greatest and most memorable road trips in the world. Start applying this veteran’s mindset to your own itinerary today for a seamless journey.